How to Create Qt Account: Difference between revisions
No edit summary |
No edit summary |
||
| Line 7: | Line 7: | ||
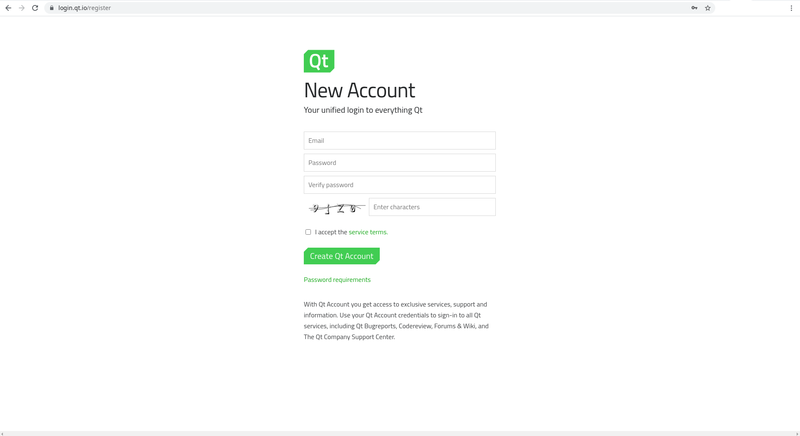
1. Go to https://account.qt.io and click on Create an Account | 1. Go to https://account.qt.io and click on Create an Account | ||
[[File:Qt account 01 create.png|800px]] | [[File:Qt account 01 create.png|border|800px]] | ||
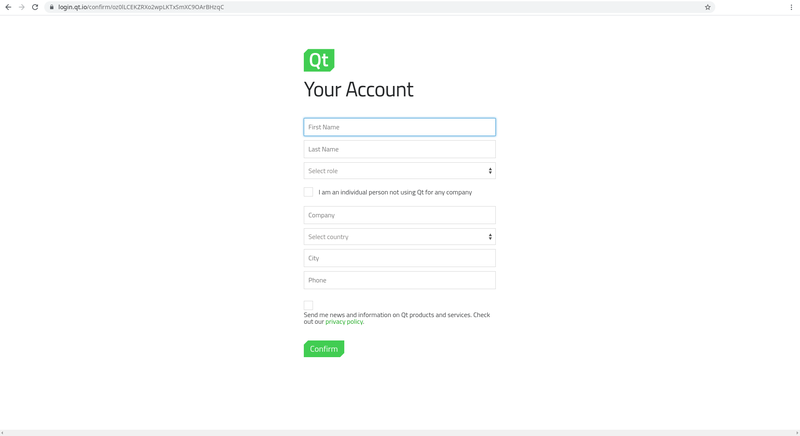
2. You will get an email with a URL to confirm the registration. Fill the information and proceed. | 2. You will get an email with a URL to confirm the registration. Fill the information and proceed. | ||
[[File:Qt account 02 confirm from email.png|800px]] | [[File:Qt account 02 confirm from email.png|border|800px]] | ||
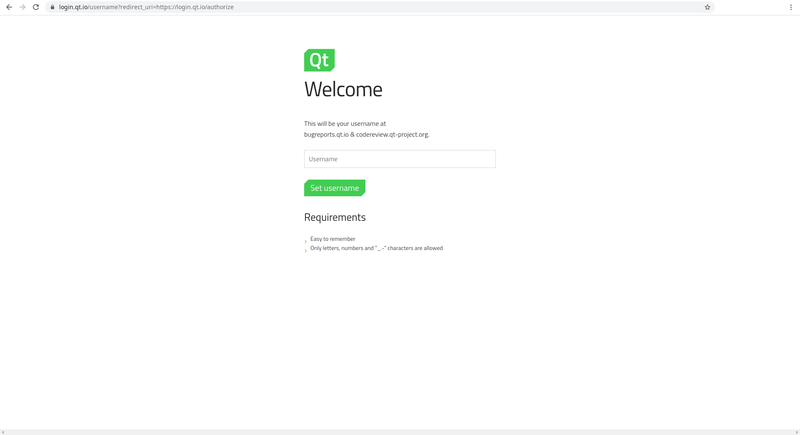
3. On the initial log-in on platforms like JIRA or Gerrit, you will get a screen to Authorize the use of your Qt Account, and since it's the first, you need to pick a username. | 3. On the initial log-in on platforms like JIRA or Gerrit, you will get a screen to Authorize the use of your Qt Account, and since it's the first, you need to pick a username. | ||
[[File:Qt account 03 first authorize.png|800px]] | [[File:Qt account 03 first authorize.png|border|800px]] | ||
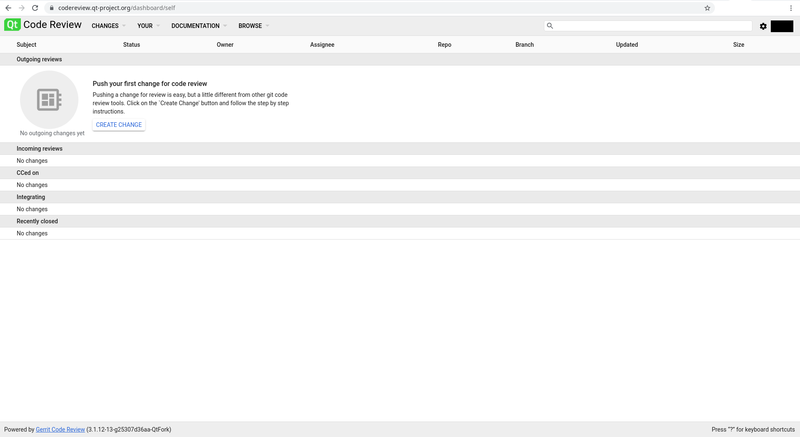
4. The initial page of Gerrit will be empty, but don't worry, all the repositories, discussions, and your future patches will be there. | 4. The initial page of Gerrit will be empty, but don't worry, all the repositories, discussions, and your future patches will be there. | ||
[[File:Qt account 04 gerrit first.png|800px]] | [[File:Qt account 04 gerrit first.png|border|800px]] | ||
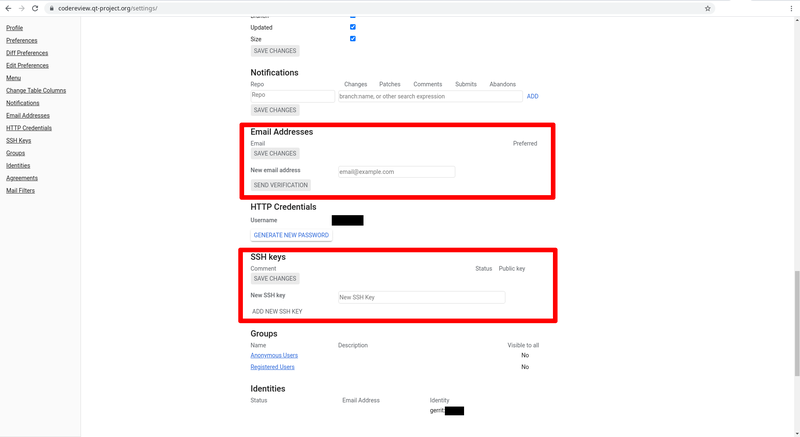
5. Go to the Settings and Add the same email that you are using with your account, and also add your SSH Key. | 5. Go to the Settings and Add the same email that you are using with your account, and also add your SSH Key. | ||
[[File:Qt account 05 gerrit settings.png|800px]] | [[File:Qt account 05 gerrit settings.png|border|800px]] | ||
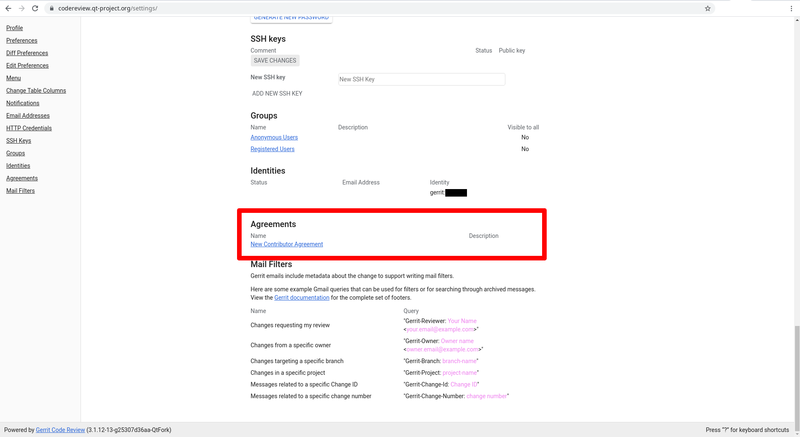
6. Go to the Agreement section and select 'New Contributor Agreement' | 6. Go to the Agreement section and select 'New Contributor Agreement' | ||
[[File:Qt account 06 gerrit agreement.png|800px]] | [[File:Qt account 06 gerrit agreement.png|border|800px]] | ||
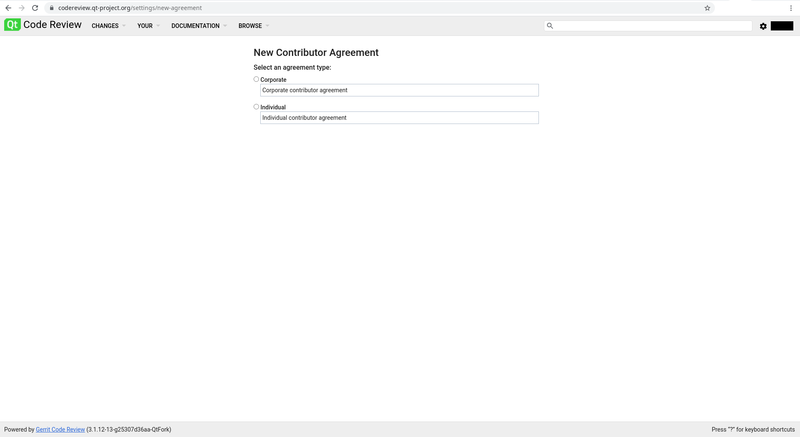
7. Select the best option that describe the usage of your account, Corporate or Individual. | 7. Select the best option that describe the usage of your account, Corporate or Individual. | ||
[[File:Qt account 07 gerrit new agreement.png|800px]] | [[File:Qt account 07 gerrit new agreement.png|border|800px]] | ||
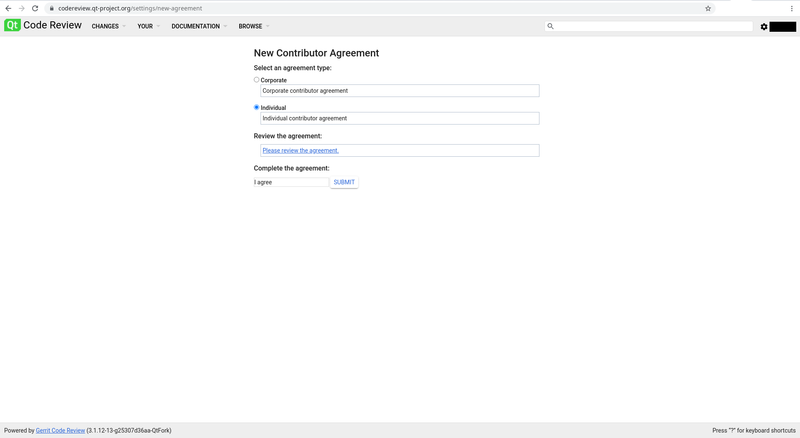
8. Once you select one, you need to enter 'I agree' on the Text Edit field an Submit. | 8. Once you select one, you need to enter 'I agree' on the Text Edit field an Submit. | ||
[[File:Qt account 08 gerrit agreement accept.png|800px]] | [[File:Qt account 08 gerrit agreement accept.png|border|800px]] | ||
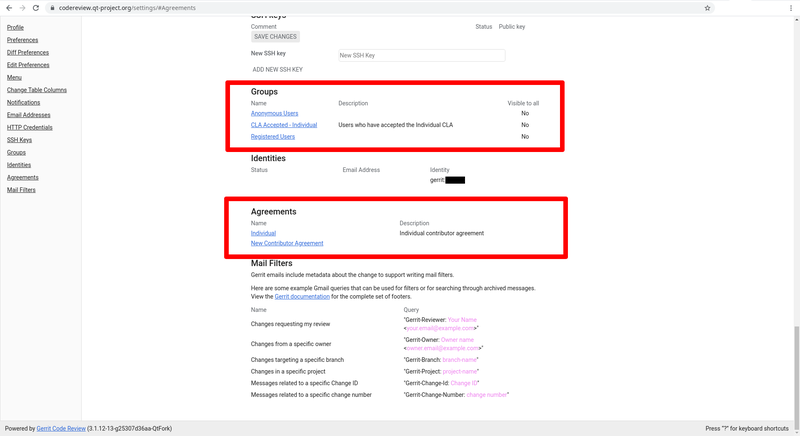
9. Once that's finish, on your Setting page you will see that now the CLA is Accepted, and you have an agreement. | 9. Once that's finish, on your Setting page you will see that now the CLA is Accepted, and you have an agreement. | ||
[[File:Qt account 09 gerrit agreement ok.png|800px]] | [[File:Qt account 09 gerrit agreement ok.png|border|800px]] | ||
Latest revision as of 21:05, 17 June 2021
Step by step process motivated by the Akademy 2021 Workshop on How to contribute to Qt.
Steps
1. Go to https://account.qt.io and click on Create an Account
2. You will get an email with a URL to confirm the registration. Fill the information and proceed.
3. On the initial log-in on platforms like JIRA or Gerrit, you will get a screen to Authorize the use of your Qt Account, and since it's the first, you need to pick a username.
4. The initial page of Gerrit will be empty, but don't worry, all the repositories, discussions, and your future patches will be there.
5. Go to the Settings and Add the same email that you are using with your account, and also add your SSH Key.
6. Go to the Agreement section and select 'New Contributor Agreement'
7. Select the best option that describe the usage of your account, Corporate or Individual.
8. Once you select one, you need to enter 'I agree' on the Text Edit field an Submit.
9. Once that's finish, on your Setting page you will see that now the CLA is Accepted, and you have an agreement.
