Getting Started with Qt Bridge for Figma: Difference between revisions
Projects for MCUs |
Export Settings |
||
| Line 37: | Line 37: | ||
#Select an item in Figma, that you want to verify | #Select an item in Figma, that you want to verify | ||
#Check Home -> Node Info | #Check Home -> Node Info | ||
'''Note:''' Node Info can also display non-MCU related information, such as rasterization tips. These are also available in a regular mode (Export target: Qt) | |||
[[File:Qt bridge node info.png|thumb|none|521x521px]] | |||
[[ | == Export Settings == | ||
Qt Bridge for Figma has a number of settings that allow end users to control the export process and customize the QML code generated in Qt Design Studio. You can find out how to use the available options by: | |||
*visiting the [https://doc.qt.io/qtdesignstudio/qtbridge-figma-using.html#export-settings Export Settings] documentation page | |||
*exploring the Figma project: [https://www.figma.com/community/file/991699001037508864 Qt Bridge for Figma Tutorial] | |||
*visiting the FAQ page: [https://wiki.qt.io/QtDesignStudio/MCU_FAQ#What's_the_difference_between_Home_and_Settings_tabs_in_the_Qt_Bridge_for_Figma? What's the difference between Home and Settings tabs in the Qt Bridge for Figma?] | |||
*checking the built-in documentation - just hover the mouse pointer over the setting you are interested in and wait for the tooltip | |||
Sometimes a particular setting may be disabled (grayed out). This means that you cannot use it in a certain context. For example: the 'Start screen' option can only be applied to the top level components or frames, Design Effects cannot be applied in the MCU context etc. To learn more about limitations, see the ''Known issues or limitations'' section. | |||
Revision as of 15:19, 15 November 2024
The following instruction is a getting started guide to the Qt Design Studio and it's integration with Figma through the Qt Bridge. The focus is on Qt for MCU project development. If you are new to the Qt Design Studio, please visit the Qt Design Studio Documentation for detailed installation instructions, getting started guide and tutorials.
Qt Bridge for Figma
Qt Bridge for Figma is a plugin that allows you to export projects from Figma and ultimately convert them into executable QML code in Qt Design Studio. The plugin has a number of settings that allow you to customize the export process or inject QML code into QML components. It also has a special Qt for MCUs mode that respects MCU limitations and provides useful hints during design creation.
If you are interested in the technical details of the Qt Design Studio and Figma integration, read the Qt-Bridge Metadata format article and watch the Qt Bridge Plugins in Depth video.
Getting Qt Bridge for Figma
Note: Qt Bridge for Figma is available under the Qt Design Studio Enterprise license
- Go to the plugin page
- Click on 'Open in Figma' (it may ask you to to log in to your Figma account)
- Open in... -> Playground file (or one any of your recent projects)
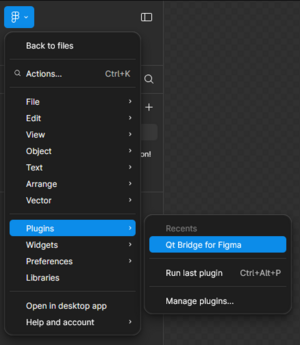
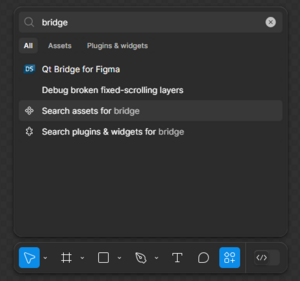
- Plugin is now available via main menu or over actions (Ctrl + K)


Projects for MCUs
MCU platforms have limited resource availability, so getting the most out of them is critical. To achieve the best results, we have introduced Qt Quick Ultralite, which is specifically designed for embedded platforms. However, there are differences between the regular Qt library and Qt Quick Ultralite (you can read more about them here). When working on a project for MCUs, you need to be aware of these limitations. To help you best prepare your project before exporting to Qt Design Studio, we have added a special mode to Qt Bridge for the Figma plugin.
Note: To learn more about limitations, see Known issues or limitations section.
Export target: Qt for MCUs
The MCU mode in the Qt Bridge for Figma has two main purposes:
- preset plugin settings so that customization of the export process is compatible with the Qt Quick Ultralite
- enable MCU-specific checks, that provide a valuable information when using properties or effects that can't be reflected in the Qt Quick Ultralite

If you want to see Qt for MCUs warnings:
- Go to the Settings
- Set the Export target to 'Qt for MCUs'
- Select an item in Figma, that you want to verify
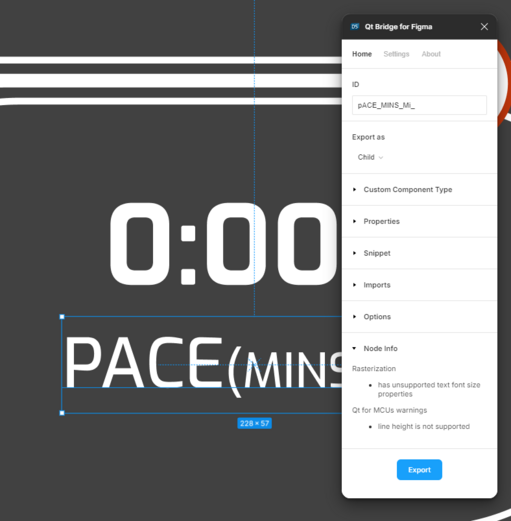
- Check Home -> Node Info
Note: Node Info can also display non-MCU related information, such as rasterization tips. These are also available in a regular mode (Export target: Qt)

Export Settings
Qt Bridge for Figma has a number of settings that allow end users to control the export process and customize the QML code generated in Qt Design Studio. You can find out how to use the available options by:
- visiting the Export Settings documentation page
- exploring the Figma project: Qt Bridge for Figma Tutorial
- visiting the FAQ page: What's the difference between Home and Settings tabs in the Qt Bridge for Figma?
- checking the built-in documentation - just hover the mouse pointer over the setting you are interested in and wait for the tooltip
Sometimes a particular setting may be disabled (grayed out). This means that you cannot use it in a certain context. For example: the 'Start screen' option can only be applied to the top level components or frames, Design Effects cannot be applied in the MCU context etc. To learn more about limitations, see the Known issues or limitations section.