Haiku installation: Difference between revisions
AutoSpider (talk | contribs) (Convert ExpressionEngine section headers) |
Henri Vikki (talk | contribs) (Images.) |
||
| Line 1: | Line 1: | ||
= Installing Haiku OS in a virtual machine = | = Installing Haiku OS in a virtual machine = | ||
| Line 14: | Line 14: | ||
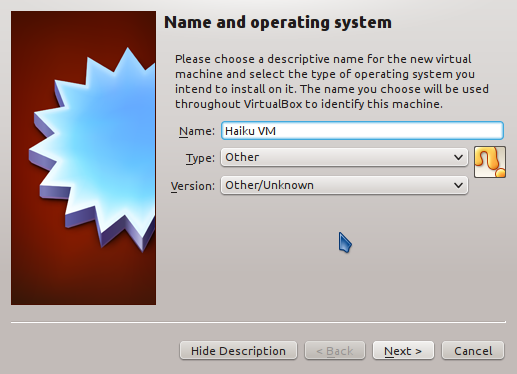
1) Create a new virtual machine and use Other/Unknown as operating system type and version | 1) Create a new virtual machine and use Other/Unknown as operating system type and version | ||
http://www.kdab.com/~tokoe/persistent/qthaiku/virtualbox01.png | |||
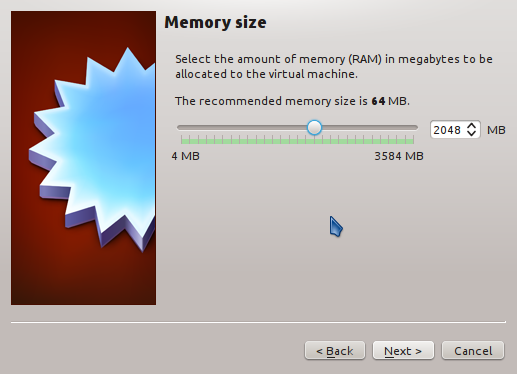
2) Select an appropriated amount of RAM, 2GB should be sufficient | 2) Select an appropriated amount of RAM, 2GB should be sufficient | ||
http://www.kdab.com/~tokoe/persistent/qthaiku/virtualbox02.png | |||
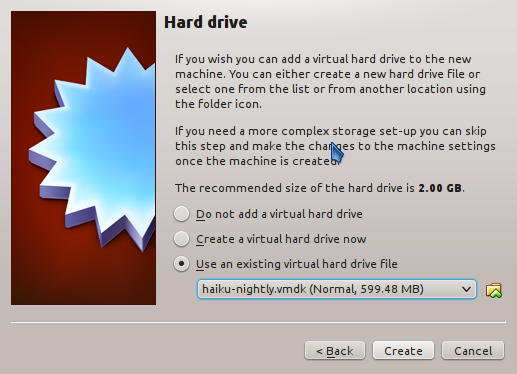
3) Choose the 'Use an existing virtual hard drive file' entry and select the downloaded haiku-nightly.vmdk file. | 3) Choose the 'Use an existing virtual hard drive file' entry and select the downloaded haiku-nightly.vmdk file. | ||
A click on 'Create' will finalize the creation of the virtual machine. | A click on 'Create' will finalize the creation of the virtual machine. | ||
http://www.kdab.com/~tokoe/persistent/qthaiku/virtualbox03.png | |||
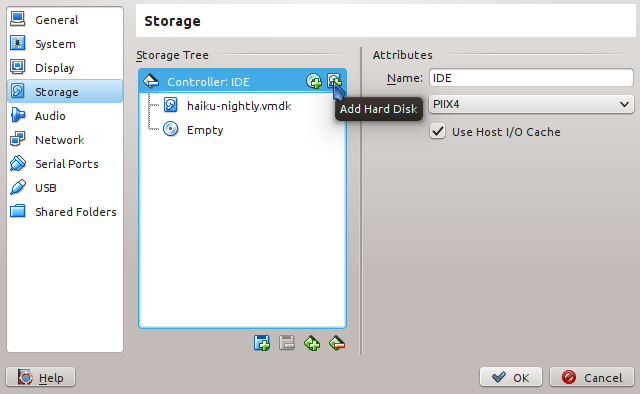
4) Since the haiku-nightly.vmdk contains just the system partition with little additional disc space left, | 4) Since the haiku-nightly.vmdk contains just the system partition with little additional disc space left, | ||
| Line 27: | Line 30: | ||
To add a new hard disc, open the 'Setting' dialog of the newly created virtual machine and click on | To add a new hard disc, open the 'Setting' dialog of the newly created virtual machine and click on | ||
the 'Add Hard Disk' button of the IDE controller on the 'Storage' tab. | the 'Add Hard Disk' button of the IDE controller on the 'Storage' tab. | ||
http://www.kdab.com/~tokoe/persistent/qthaiku/virtualbox04.png | |||
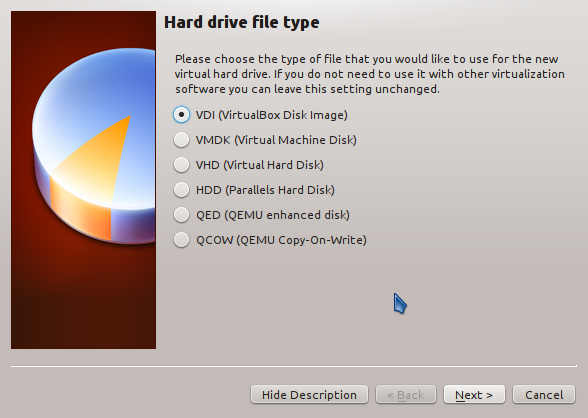
5) Select VDI as hard drive type (or whatever else you prefer) | 5) Select VDI as hard drive type (or whatever else you prefer) | ||
http://www.kdab.com/~tokoe/persistent/qthaiku/virtualbox05.png | |||
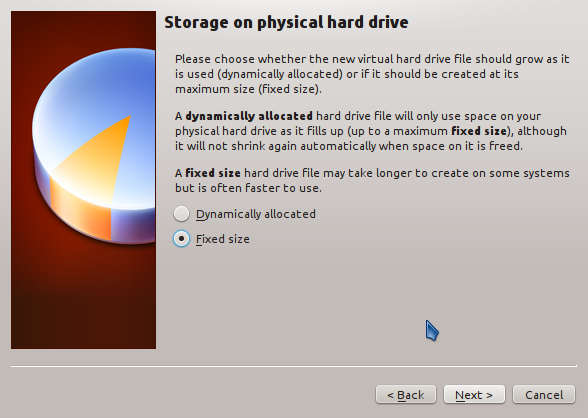
6) For the VDI hard drive it is recommended to use 'Fixed size' mode, to speed up disc access during compilation | 6) For the VDI hard drive it is recommended to use 'Fixed size' mode, to speed up disc access during compilation | ||
http://www.kdab.com/~tokoe/persistent/qthaiku/virtualbox06.png | |||
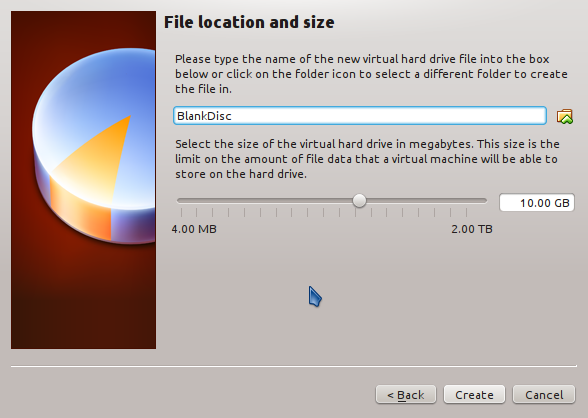
7) In the next step select a meaningful name for that disc and select a proper size (10GB are sufficient for building qtbase) | 7) In the next step select a meaningful name for that disc and select a proper size (10GB are sufficient for building qtbase) | ||
After a click on 'Create', the virtual hard disc is created and the virtual machine ready to use. | After a click on 'Create', the virtual hard disc is created and the virtual machine ready to use. | ||
http://www.kdab.com/~tokoe/persistent/qthaiku/virtualbox07.png | |||
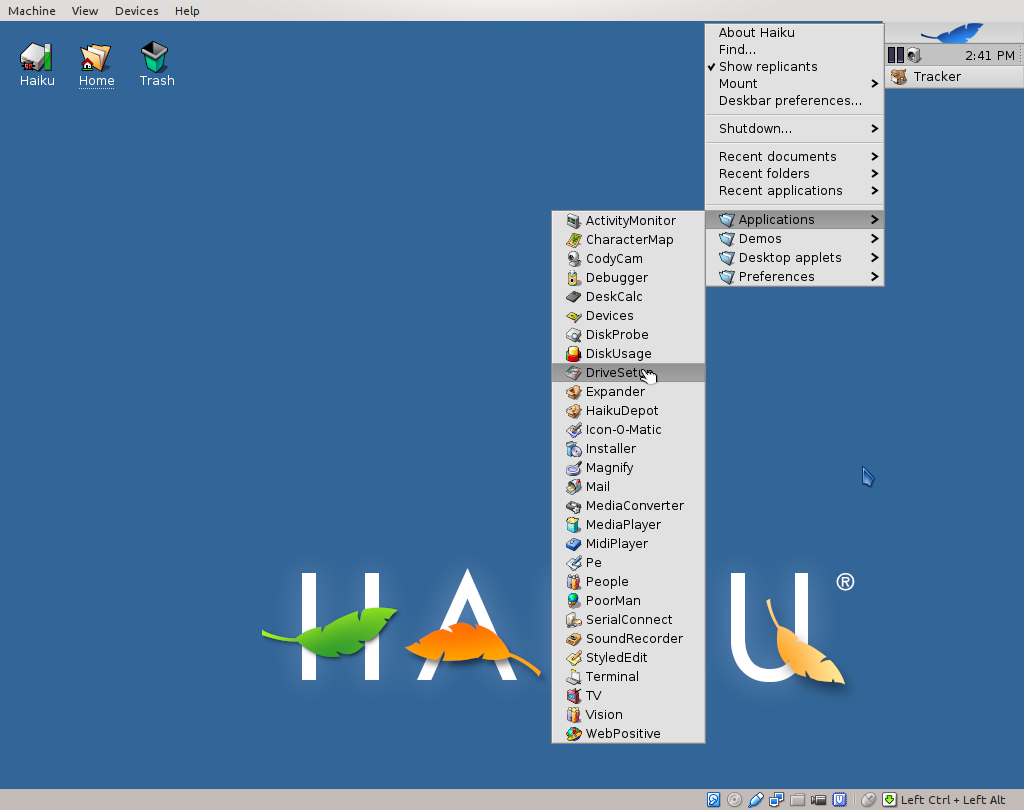
8) Now start the virtual machine and go through the setup wizard that is executed the first time you | 8) Now start the virtual machine and go through the setup wizard that is executed the first time you | ||
run the new Haiku OS installation. When that is done and the desktop is ready, start the 'DriveSetup' tool | run the new Haiku OS installation. When that is done and the desktop is ready, start the 'DriveSetup' tool | ||
from the Tracker menu to format the additional virtual hard disc with a Be file system. | from the Tracker menu to format the additional virtual hard disc with a Be file system. | ||
http://www.kdab.com/~tokoe/persistent/qthaiku/virtualbox08.png | |||
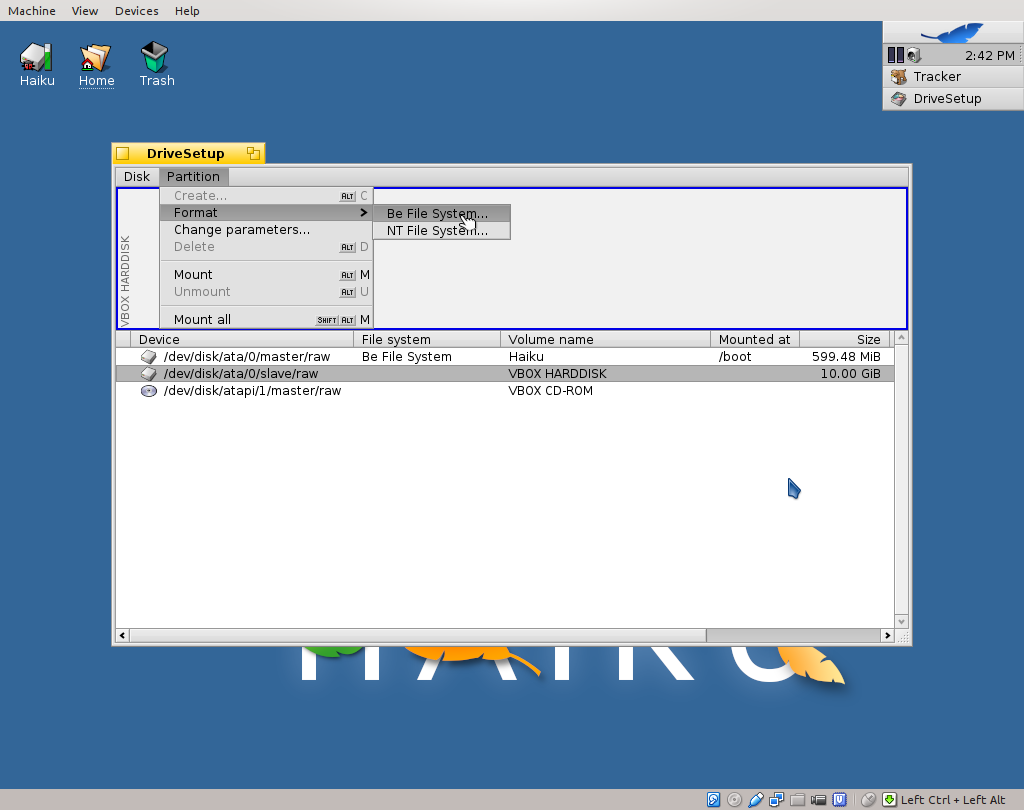
9) Select the empty virtual disc in the table and choose the 'Partition -> Format-> Be File System…' | 9) Select the empty virtual disc in the table and choose the 'Partition -> Format-> Be File System…' | ||
entry from the menu. | entry from the menu. | ||
http://www.kdab.com/~tokoe/persistent/qthaiku/virtualbox09.png | |||
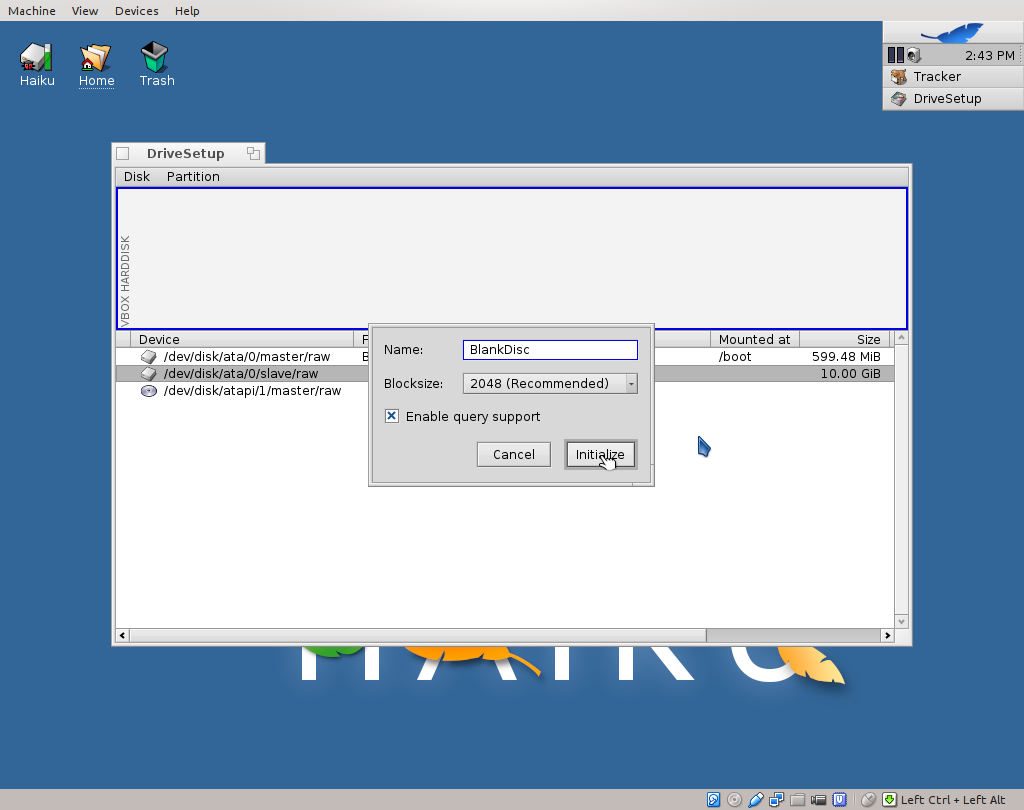
10) Give the virtual disc a meaningful name and click 'Initialize' to start the formatting. | 10) Give the virtual disc a meaningful name and click 'Initialize' to start the formatting. | ||
http://www.kdab.com/~tokoe/persistent/qthaiku/virtualbox10.png | |||
11) Once the formatting has finished ('File system' columns shows 'Be File System'), right click on | 11) Once the formatting has finished ('File system' columns shows 'Be File System'), right click on | ||
the disc entry and select 'Mount' to mount the disc under '/' | the disc entry and select 'Mount' to mount the disc under '/' | ||
http://www.kdab.com/~tokoe/persistent/qthaiku/virtualbox11.png | |||
Latest revision as of 12:03, 27 March 2015
Installing Haiku OS in a virtual machine
The Haiku OS is available in a stable version (R1/Alpha 4.1) and nightly images. Since R1/Alpha 4.1 was released in November 2012, it is kind of outdated and shouldn't be used for development of new applications anymore. The nightly images are quite stable so far and can be downloaded from http://download.haiku-os.org/nightly-images/x86_gcc2_hybrid/
To compile/test Qt5 on Haiku, we recommend to use the latest VMDK image inside VirtualBox or VMware, but you can also do a native installation on bare metal with the provided ISO images.
Once you have downloaded the ZIP archive of the VMDK (~270MB), unzip it and you'll get a haiku-nightly.vmdk disc image. The following steps show how to setup VirtualBox to get a running Haiku system:
1) Create a new virtual machine and use Other/Unknown as operating system type and version
2) Select an appropriated amount of RAM, 2GB should be sufficient
3) Choose the 'Use an existing virtual hard drive file' entry and select the downloaded haiku-nightly.vmdk file. A click on 'Create' will finalize the creation of the virtual machine.
4) Since the haiku-nightly.vmdk contains just the system partition with little additional disc space left, we need an additional partition (virtual hard disc) where we can keep the Qt git repository and build directory. To add a new hard disc, open the 'Setting' dialog of the newly created virtual machine and click on the 'Add Hard Disk' button of the IDE controller on the 'Storage' tab.
5) Select VDI as hard drive type (or whatever else you prefer)
6) For the VDI hard drive it is recommended to use 'Fixed size' mode, to speed up disc access during compilation
7) In the next step select a meaningful name for that disc and select a proper size (10GB are sufficient for building qtbase) After a click on 'Create', the virtual hard disc is created and the virtual machine ready to use.
8) Now start the virtual machine and go through the setup wizard that is executed the first time you run the new Haiku OS installation. When that is done and the desktop is ready, start the 'DriveSetup' tool from the Tracker menu to format the additional virtual hard disc with a Be file system.
9) Select the empty virtual disc in the table and choose the 'Partition -> Format-> Be File System…' entry from the menu.
10) Give the virtual disc a meaningful name and click 'Initialize' to start the formatting.
11) Once the formatting has finished ('File system' columns shows 'Be File System'), right click on
the disc entry and select 'Mount' to mount the disc under '/'
