Quick Start: Installing Qt on Windows
Jump to navigation
Jump to search
This guide is for newcomers to Qt on Windows. It explains simple steps to set up Qt and Qt Creator with minimum fuss.
- Note: Qt Creator is separate from Qt. Qt is a multi-purpose library which your applications can use; Qt Creator is an Integrated Development Environment (IDE) which lets you edit, manage, build, and test your projects. It is entirely possible to use Qt without using Qt Creator and vice-versa, but this guide encourages you to use both.
Installation Steps
- Get the installer from the Downloads page.
- Run the installer. Log in with your Qt Account (or create one if you don't have one).
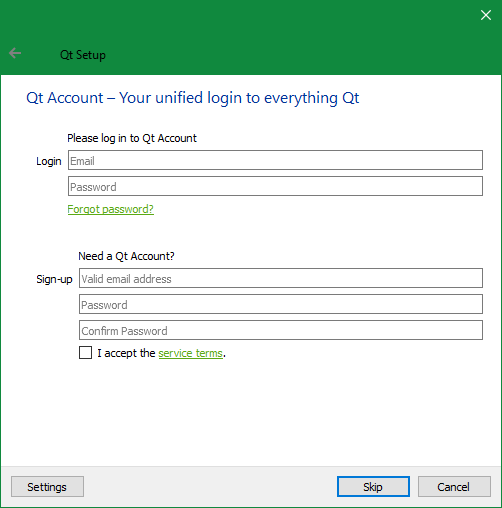
Note: While optional, a Qt Account lets you participate in the community forums, submit bug reports and feature requests to the issue tracker, contribute code and documentation to the Qt Project, edit articles in the Qt Wiki, and manage your commercial Qt license (if any).
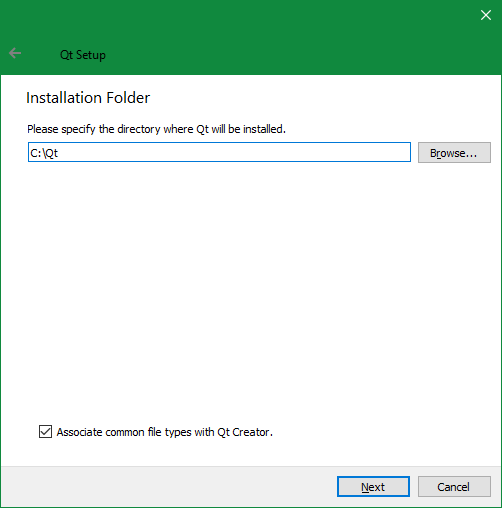
- At the "Installation Folder" page, choose a folder to install Qt. The default (C:\Qt) is recommended unless you don't have permission to install there.
- At the “Select Components” page, expand and select Qt > Qt [LATEST_VERSION] > MinGW [LATEST_VERSION]. This will install the pre-built Qt libraries which are compatible with the MinGW compiler.
- The example screenshot below shows Qt 5.12.0 for MinGW 7.3.0 being selected (Qt > Qt 5.12.0 > MinGW 7.3.0 64-bit)
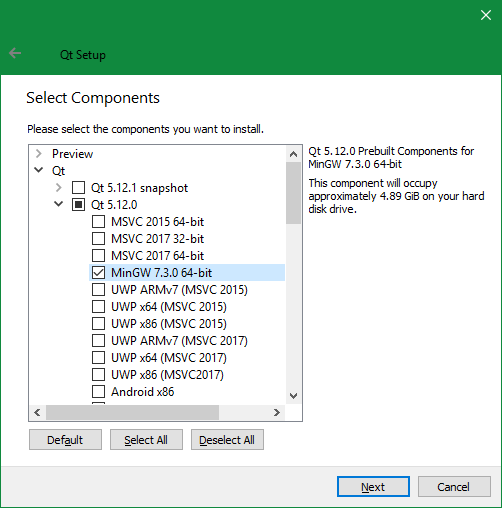
- Warning: Be sure to tick the MinGW-specific version of Qt. If you simply tick the Qt version number (like "Qt 5.12.0"), you will install all available builds, which consumes many 10s of gigabytes!
- Ignore any "Preview", "RC" (Release Candidate), or "snapshot" components because these are not fully tested and released yet.
- The example screenshot below shows Qt 5.12.0 for MinGW 7.3.0 being selected (Qt > Qt 5.12.0 > MinGW 7.3.0 64-bit)
- Scroll down to the bottom of the "Select Components" tree. Expand and select Qt > Tools > MinGW [LATEST_VERSION] (the MinGW version must match your selection in step #4). This will install the MinGW compiler itself.
- The example screenshot below shows the MinGW 7.3.0 toolchain being selected (Qt > Tools > MinGW 7.3.0 64-bit):
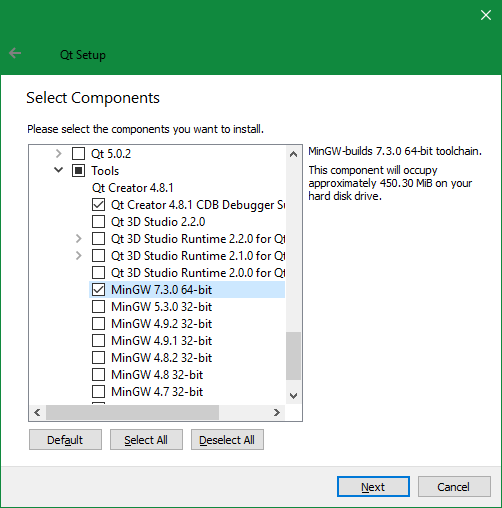
- Note: This is a special case. Usually, library installers don't provide compilers! However, the Qt installer provides the MinGW compiler for your convenience.
- The example screenshot below shows the MinGW 7.3.0 toolchain being selected (Qt > Tools > MinGW 7.3.0 64-bit):
- Read and accept the license agreements, keep the default Start Menu shortcuts, and install Qt.


.png)
.png)
Once installation completes, you are ready to start using Qt.