How to create a multi language application
How to create a multi lingual application that can switch the language at runtime?
Create a standard application, e.g. with a main window

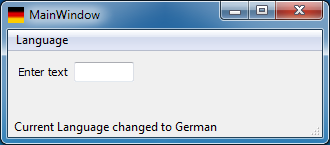
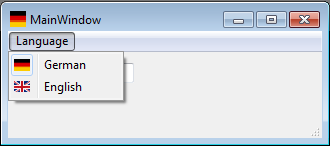
In this example, we create a main window with a menu Language and some widgets. If the user opened the language menu, there is a selection of languages, which is created on startup of the application, dependant on the existing language files.
File system structure of the application:
- <Application directory>
- binaries
- <Application directory>/languages
- For each installed language, there is an (optional) image of the size 16×16 pixel with a flag (e.g. de.png)
- The translated text files of the application (TranslationExample_*.qm, where * could be de, en, …)
- the translation files of Qt (qt_*.qm)
Class definition
In the class MainWindow, the virtual method changeEvent [doc.qt.nokia.com] is overwritten. For each translation file, that is needed, a QTranslator [doc.qt.nokia.com] instance is created (in our example 2, on for the application texts, one for qt). The current language is stored to suppress events, if the user tries to load the same language twice.
The language menu is created dynamically during application start, depending on the existing translation files. The advantage of this solution is, you can deliver any translation later on, and it will just work after application restart. In this example, all text files are located in the sub folder “languages”. It is possible to place some icons there (language.png) which is used as icon in the menu (e.g. a flag).
Each language is represented by a QAction [doc.qt.nokia.com] object which is added to a QActionGroup [doc.qt.nokia.com]. This is done to achieve, that only one slot is needed for all languages:
Switching the language
If the language should be switched, the needed target language is extracted from the QAction [doc.qt.nokia.com] object and the existing translators are removed (QApplication::removeTranslator [doc.qt.nokia.com] ). After that, the new language files are loaded, and if successful, the translator is installed again (QApplication::installTranslator [doc.qt.nokia.com] ). This is done to ensure, a
QEvent::LanguageChange [doc.qt.nokia.com] event is emitted by the application object. It the application only contains one top level window, that is completely created by designer, it is also possible to just read the new translation files and call ui.retranslateUi(this) directly.
- QEvent::LanguageChange [doc.qt.nokia.com] will always be called, if a translator object is installed in the application object
- QEvent::LocaleChange [doc.qt.nokia.com] is called, when the system language is switched
Add translations to the project
In your QMake [doc.qt.nokia.com] project file, the following variable TRANSLATIONS [doc.qt.nokia.com] has to be added and must contain all language filesyou want to create initially.
By calling lupdate [doc.qt.nokia.com]
You create the language files (*.ts), which you translate by using the tool Qt Linguist [doc.qt.nokia.com]
After doing this, you call lrelease [doc.qt.nokia.com] to create the binary language files (*.qm):
Deploying to Symbian
In case your deploy target is a Symbian device then you need to add a special rule in the .pro file to pack the .qm files along with the executable or else the translation wont work. So:
Hopefully, this can help you.